Sunday, April 18, 2010

An Award!

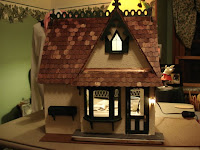
First I want to apologize for the lateness of this posting.  Things have been so crazy in my real life right now.  Thank you so much to Jamie at http://jlilroomer.blogspot.com/ for giving me an award.  It is my turn to give it to 5 others.  So here goes:

Tiny Treasures
A Life in Miniature
Bear Cabin Miniatures
It's a Miniature Life
Beautiful Mini Blessings

Sunday, March 7, 2010

Thanks to new followers

A big thanks to my new followers. I am sorry I wasn't able to thank you earlier, but here goes. Thanks to:
- Maija from Finland. Her site is at http://iidasanttu.blogspot.com/
- A follower from California whose blog is at http://myrealitty.blogspot.com/ who writes of her 20 houses. 
- Karin whose blog I can't seem to locate. 
- Sylvia from Spain whose blog is at http://miniaturasnatasylvia.blogspot.com/and has won some awards and has some lovely pictures on her blog of her work.
- Michelle from Belgium whose blog is at http://michelle-minithings.blogspot.com/http://michelle-minithings.blogspot.com/ and has a really cute bathroom she is working on.
- Angeles from Spain whose blog is at http://elrincondebaldu.blogspot.com/and has some darling pictures of baby clothes on her site.
- Cheryl from Hawaii whose blog is at http://aminiatureplace.blogspot.com/ and is venturing in to some really small scale things.
- Cynthia from Pennsylvania who's a writer, a minaturist and web designer and has an Etsy shop http://www.etsy.com/shop/BriarwoodMiniatures
- Susan from Australia at http://minicrochetmad.blogspot.com/ who does the teenist bears I have seen.

A big thanks to my new followers!

Thursday, March 4, 2010

Almost Done

Finally got the astroturf for the garden and put that down.  Got a cute little birdbath and put that in the garden. 

The last few steps are putting the resin in for the pond, getting or making a few more plants for the garden, and getting a few more touches for the inside. 


Other shots of the cottage:


Thursday, February 11, 2010

Inside

As you may remmber, I have been kind of snowbound with the weather in my area of Pennsylvania.  So since I was inside, I worked on the inside of the cottage.  I have mostly completed it.  I have to get some kind of threshold for the slate entryway, get the light on the side table plugged in, put in the baseboard, fix the chandelier, and of course add some kick kacks.  But for the most part it is done.  I really like the light, airy feel that the place presents.  If I had a cottage in lifesize I think I just might decorate it this way. 

I can't wait until I get the grass for the garden and the resin for the pond.  I made my own fish, a little bigger than the one my son made, and have that in the pond.  I have to get some pastels to shade them as they are too yellow, but for my first attempt I think they work.  I also made a little birdhouse and a shepard's hook that it hangs on, which you can see to the left of the picture.  I found the house at PrintMini and glued that onto balsa wood and then constructed it with an eye pin from my bead collection and it looks kind of cute. 

So now I am completely dug out and will have to go to work tomorrow.  Oh well, a holiday is coming on Monday and there's the weekend, so maybe I'll get some other things done.  I have to wait until some more supplies arrive, though.

Wednesday, February 10, 2010

More Garden

Two posts in one day!  Well as I said earlier it's been snowy all day and we aren't really supposed to go out on the roads, so what better to do that minis.  I have been working on the garden most of the day and after the shrub I made a daylilly and did some other small things.  The flower was from an article in Dollhouse Miniatures, issues 10 and 11 by a woman named Jo Bevilacqua about how to make a summer oasis called "Leni's Garden Wall".  This daylilly is made with 28 gauge copper wire and paper petals.  You take a length of it and twist 3-4 loops of it to create the stalks, add the petals, paint the wire with acrylic paint and fabric glue, and then put on the leaves.  I was unable to located the smaller wire she suggested for the stamen, so instead I didn't put those in, but I followed most of the other directions and I think it turned okay.

In the picture of the side yard you can see a fish in the pond.  My son made that and right now it's lying on its side but will be swimming once I get the resin to fill the pond.  I tried to make another one, but was unable to, so maybe the fish will be the only one.  Maybe I will get him to make another one.   

Shrubbery

I tried my hand at a shrub today.  I came across a blog that gave instructions of doing one by taking some floral foam, spraying it with adhesive, and rolling it in model railroad foliage.  Well spraying really didn't work, so I ended up tearing up small sections of the foam and dipping it in the fast grab and putting it on the foam.  I doesn't look too bad.

It's snowing again in this area.  I had driven in to work early this morning and the roads were pretty good at that time, but things got really bad and they let us go - those who actually made it in.  I am glad I left when I did because now they have declared a state of emergency and I could have gotten stuck at the office and been really unhappy.  So now I am home and able to work on my house.  I am happy.

Saturday, February 6, 2010

Flowers!

It's snowing its tail off out there and it's a Saturday so I don't have to go to work, so what better to do than minis! I love it!


Anyway, over at Casey's Minis she is doing a tutorial on making germaniums.  They looked simple enough even for me to do. I was having trouble finding the punch for the petals and looked high and low for them. The site that had those punches was shown by Tabitha in her blog. So I went to that site and found that they are way too rich for my blood, so I searched some more.

Then yesterday coming home from work I decided to stop by Michael’s because I knew the snow was coming and wanted to have all my supplies for the weekend. Anyway while wonder through the scrapbook section I found a pack of mini punches and one of them is the small flower that Casey was talking about. They were only $14 rather than the $48 that the ones online were! I am sure they are nowhere near the quality as the higher priced one, but they will suit my purposes. So I got to work last night and while I was looking around for the beads that Casey was talking about in her tutorial my eye fell upon a box of large headed pins that I was using for sewing some placemats. So I used them instead and created some sort-of-looking-geraniums. I don’t have the punch for the leaves and tried using the small heart one by gluing the tiny corner of one under the petal part. You can see it peeking out of the flower on the extreme right. But I think its way too small. One thing is that you have to use the Aleene’s Fast Grab glue on this project for sure! I did follow those instructions and I can just imagine using the white glue; the petals would just slide off the pin head.
The other thing that Casey suggested was using double thickness suede for the cupping part. I didn’t have that, but the fleshy part of my upper thigh under the sweatpants worked very well; well except for the tiny bruises on it : ) 

I will keep looking for the punch for the leaves, but for now, I think my sort-of-geraniums look good and they will be fine with lots of them jammed into the space in the large window box on the front of the cottage.  I'll post that when it's done.

Sunday, January 31, 2010

Garden Pond

For weeks I have been practically obsessing about my pond. I was looking at pictures on the Internet of life size and miniature ponds. I had found a tutorial a while back on how to do a goldfish for a pond and I was trying to find it again. I had set everything up on the side yard and tried to determine where the pond would go and where it would look most natural. The other day I purchased a bag of smooth river stones from Michael’s Craft Shop and looked around for something to use them with. Carved foam with aluminum foil? No. A paper cup? No.

Finally, I was looking around and found in the closet some oval cups that are to be used for dying eggs. They come in five colors and one of them was green. I say was because I ending up taking the green one and cutting it way down to about half an inch deep and gluing the stones around it. I think it turned out nicely. I then mixed some green and brown paint and coated the bottom of the cup so it wasn't so bright green and resembled the bottom of a pond. I made some pond grasses out of scrapbook paper, but I am not sure I am going to end up with them - they are just placed there for the picture. They may look okay in the pictures, but in real life I am not sure they look realistic.

Now I need to also find some resin to use for the water, grass for the side of the garden, and shrubbery for the garden part and some flowers too. I found an article in Dollhouse Miniature magazine on how to do daylilies with wire and paper and a blog entry for doing a shrubbery with flower foam, spray adhesive, and model railroad foliage, so I am going to do that as well. I also might get a trellis for the side of the house and get some flowers or vines to climb to go along with the smiling face on the side of the house. I have been trying, very unsuccessfully to make flowers out of Fimo clay but I am not very good at that at all (really horrible), so I am going to have to save for flowers and plants for the garden and get them piece meal. I read about using dried coffee ground and tea bag leaves for the soil so I am going to use that around the plants. I had some bricks leftover from doing the chimney on my first house, so I used them for lining the garden from the grass, which you can see in the second picture. I think it’s really coming along.

I was going to put a fish in it, but I can't find the tutorial and I am really very bad at doing the clay, so maybe I won't add that.  My son is very artistic, so maybe I can get him to do it. 
 
Once I get grass down and the shrubbery made I am going to secure the fence in place and then it should be quite complete and I can move on to the interior of the cottage.

Thursday, January 28, 2010

Under Roof

I finished shingling and staining the roof. I had to use a Q-Tip in order to get into the corners, but it was better than I thought it would be because I thought I was going to get stain all over the copper valleys. I think this really adds a lot to the outside and I am now going to start on the garden part of the house.


I don't know if you can see the brown board to the right of the house which will become the garden.  I have a white picket fence all ready to be put in place and start designing the space.

Welcome and Thanks

Thanks to my new follwer Susan at http://minicrochetmad.blogspot.com/.  Thanks for following me.  I hope you enjoy what you see.

Friday, January 22, 2010

Wonderful Invention


In looking through a catalog I noticed that there was a gadget that would convert a hanging light to a plug-in. I was intrigued as I was struggling with the chandelier in the cottage. The wire that I ran from the light to the tape was showing big time and the brads, even though they worked, were bulky looking. So I order one for the light. What a life-saver!


As you can see from this picture, you take off the pad and the cover and put the little extender on. Then you have to cut the wire short and strip the insulation off and thread the bare wires through the prongs in the plastic plate and then clip it in the extender. The hardest part, at least for me, is drilling the holes for the brass cups that accept the prongs. It took a while to get it firmly connected and finally lit. But it is considerably better looking, and more realistic, than running the wires along the tape and wrapping the bare wires around those tiny brads.

Now onto doing the same thing on the walls for the two wall sockets that I have planned.


Wednesday, January 6, 2010

Lights, Part 2


I thought I would post another picture showing the electrical layout for the inside of the house.  I have laid out all the wire that I am going to and have on order two wall sockets and an adapter for the chandelier that will convert it from the light with a wire that I have to wrap the tiny wires around the small brads and allows easy removal of the lighting fixture.  You can see in the picture that I have sucessfully lighted the fixture, but it was a struggle.  I can't wait until I get them and move on to the fun part of decorating.  I also think that the adapter will make it less noticeable under the paint.

Tuesday, January 5, 2010

Lights!


I am pretty darn proud of myself, if I may be.  I successfully electrified my Storybook Cottage.  I am so excited.  This is the first time I have used the Cir-Kit Concept lighting system with the tape and tiny, tiny brads.  It took a little time to get used to putting those tiny nails into the tape and connecting the wires.  I must say it was very frustrating at first, but I finally got it.  The most difficult part for me was connecting the chandelier to the ceiling.  I also put a carriage light on the outside of the house, so along with getting the shingles on the front porch stained and getting the large flower box to the front; its moving along.

Friday, January 1, 2010

Some Finishing Touches

I put on some of the outside trim and it's looking good.  As you can see, I have put the undercoat for the roof so the shingles don't show through the white primer and I put on the top trim as well as finishing up the window trim.  I still have to put the copper flashing on, finish shingling the roof, and stain the shingles on the outside, but otherwise it's pretty finished. 

I decided to put a garden to the right of the house.  I drove by a car dealer of all places which had a beautiful patio outside.  It inspired me so much I took a picture on my cell phone of it and will use it a a guide to the little garden to the side of the Storybook Cottage.  I am looking forward to doing that.